Blog, Educational
Do you have a green thumb? A starter’s guide to growing your own marijuana plant

Jul
With only a few months left until the legalization of pot starts spreading like wildfire across the country, you may want to discover your green thumb so that you can get in on a piece of the action.
Although growing your own weed may seem like a complicated, daunting task, with the right information and guidelines you may find that you have a hidden talent for cultivating cannabis.
What do the plants need to thrive?
- Light: Whether you decide to use natural sunlight or purchase grow lights, you should consider doing some research so that you understand the light needs of the cannabis plant.
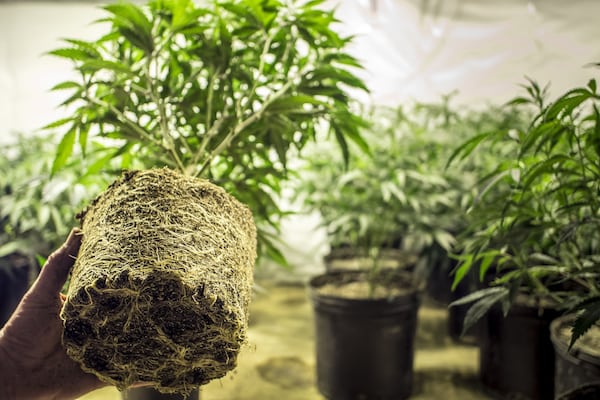
- Growing Medium: Choose a medium that you want to grow in — soil, rockwool, perlite, vermiculite, clay pellets, coco coir and many more.
- Air: Make sure your space is well ventilated.
- Temperature: Just like humans, cannabis plants are affected by extreme temperatures.
- Nutrients: Choose between pre-formulated nutrients or compost your own super soil.
- Water: Water is life. Enough said.
Now let’s grow your weed
Step 1: Indoor or outdoor?
You are able to grow your own weed pretty much anywhere that has access to fresh air and water (garage, closet or garden).
Indoor growing is a little bit pricier at first, but it offers you more control over your crop (ex. temperature).
Outdoor growing is a cheaper operation, especially because you don’t need any grow lights, but it does offer its own set of challenges such as possible pollution, theft and unexpected outdoor visitors.
Step 2: Choose your strain
Begin with a single seed versus a clone if you are a first-time grower. Indica, sativa and other hybrid strains can be purchased from local dispensaries or online from growing experts.
Step 3: Germinate your seeds
Although there are many methods for seed germination, when growing your own weed one of the easiest ways to germinate your cannabis seed is to place it directly in a specialized starter cube or seedling plug. These cubes of soil and nutrients allow you to just add water and automatically relish in the benefits of perfect germination conditions. Just place the seed in the hole of the cube or plug. Easy as that!
Step 4: Maintain the care through the vegetative stage
At this stage you can also decide whether you want to grow your plant in a pot or in the open ground. Although outdoor conditions allow your plant to grow taller, you have less control over the weather and temperature. If you are growing indoors, the size of the pot will depend on your available space and on how big you want your plant to be.
Once your plant starts to grow leaves, this is considered to be its vegetative stage. The plant is not budding quite yet, but you need to make sure to keep up your plant care and give it lots of nutrients.
It is actually pretty cool that at this stage, you can tell if your cannabis plants are going to be male or female.
Step 5: The flowering stage is here
This is the best part of the process. The flowering stage is where your plant starts to make buds. This is also the last stage before you get to harvest your plant. As the most crucial stage of the cannabis lifecycle, your plant is much more likely to suffer from lack of nutrients due to bud growth.
Step 6: It’s harvest time
You might ask yourself, “how do I know when it’s ready to be harvested?” Well, once your buds start to grow little, white hairs and they become rather fragrant, the buds are ripe for the picking. It’s time to grab a sturdy pair of scissors and cut the plant down. It’ll take a long time to trim your plant, but it’ll be worth it in the end.
Step 7: Dry and cure your buds
After you have finished trimming your beautiful buds, you will want to hang them in a cool, dark place with good air ventilation so that they are able to dry out. This is roughly a month-long process (depending on the potency you hope to achieve).
Well there you have it. Are you ready to put your green thumb to the test? Tell us in the comments section below.